
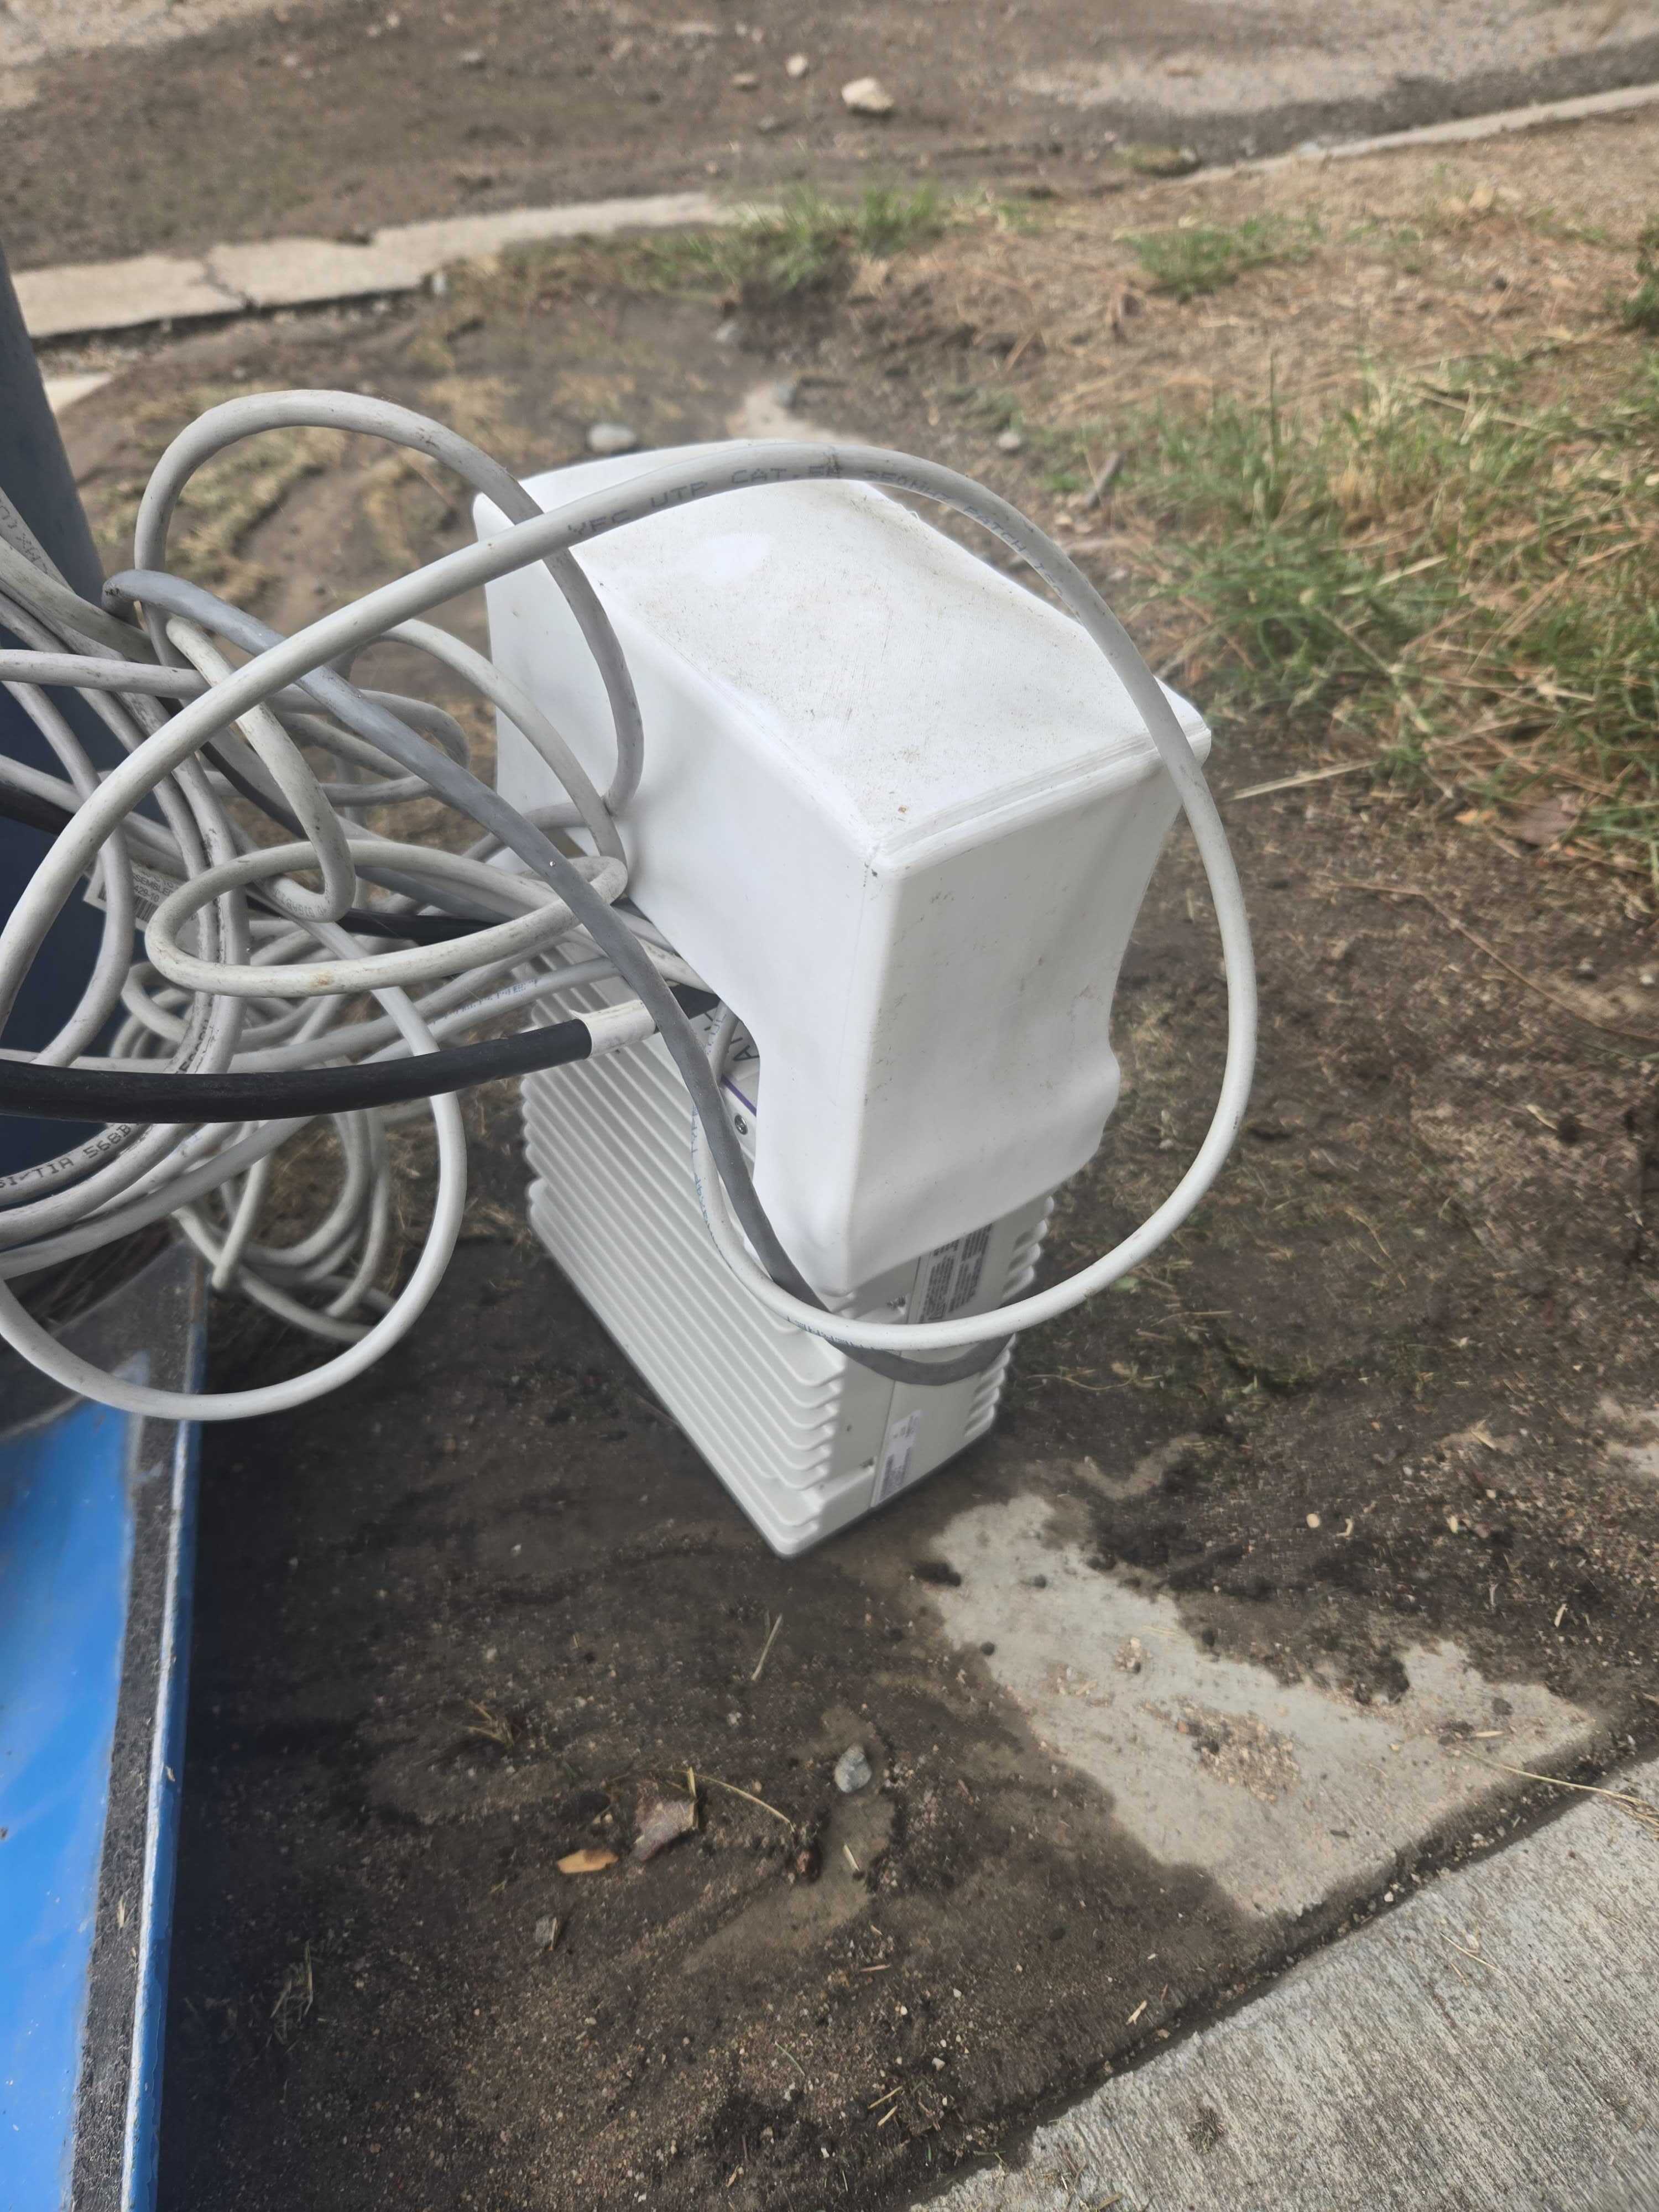
Our campus has a number of emergency "Blue Poles" that can be used to alert emergency services of any issues that are happening on campus. The idea is they are easy to spot, and have a big ol' red button on them that can be pressed to immediately reach out to campus police.
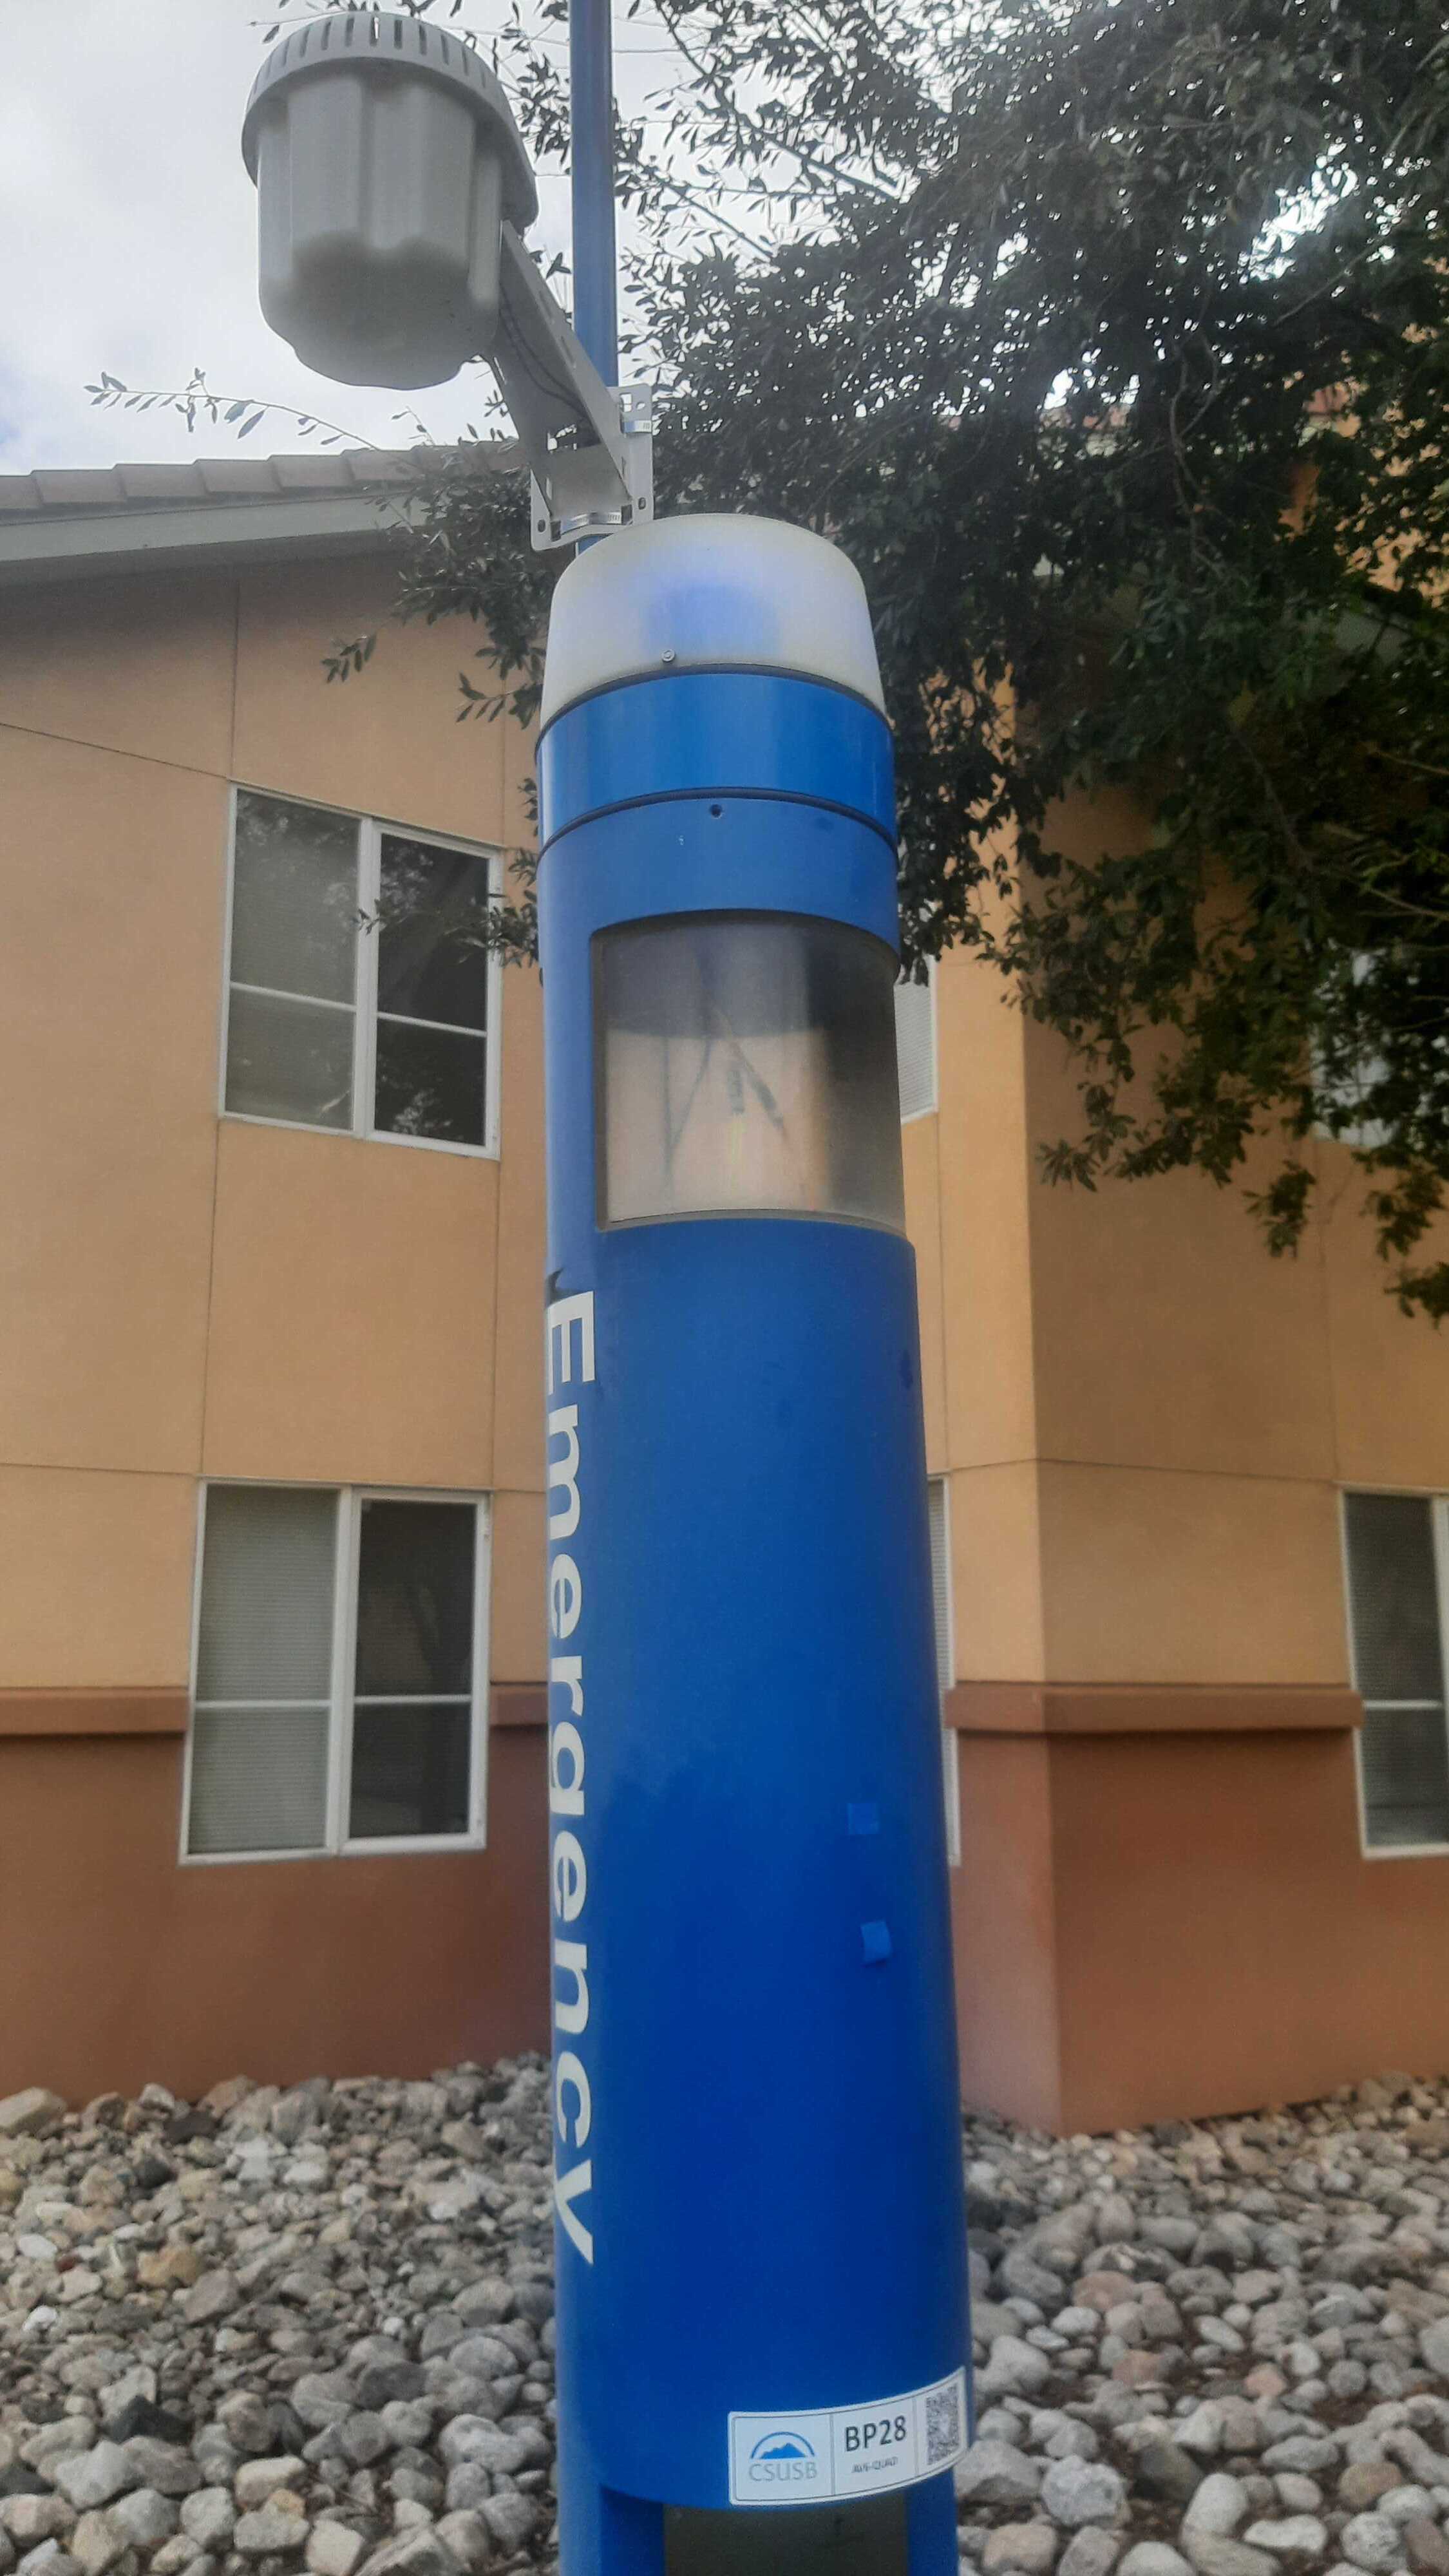
These are a great idea! The only issue is that these poles are a bit old, and after a decade or two of exposure to the elements, they are starting to show some signs of wear and tear. The rubber surroundings that are supposed to keep out the water and dust have eroded, and the equipment inside is unfortunately affected.
All the components are at risk, but the most at risk (and the priciest) item is the network switch, which I have been told is about $400 a piece. The white piece of equipment in the middle is the part in question.
.jpg)
So one of the network techs reached out to me and asked if we could make something that could go over the switch to protect it from the rain, and also be resilient enough to survive the summer heat. I have a couple of pictures of iterations of the first few designs, and the progress made between each, below:
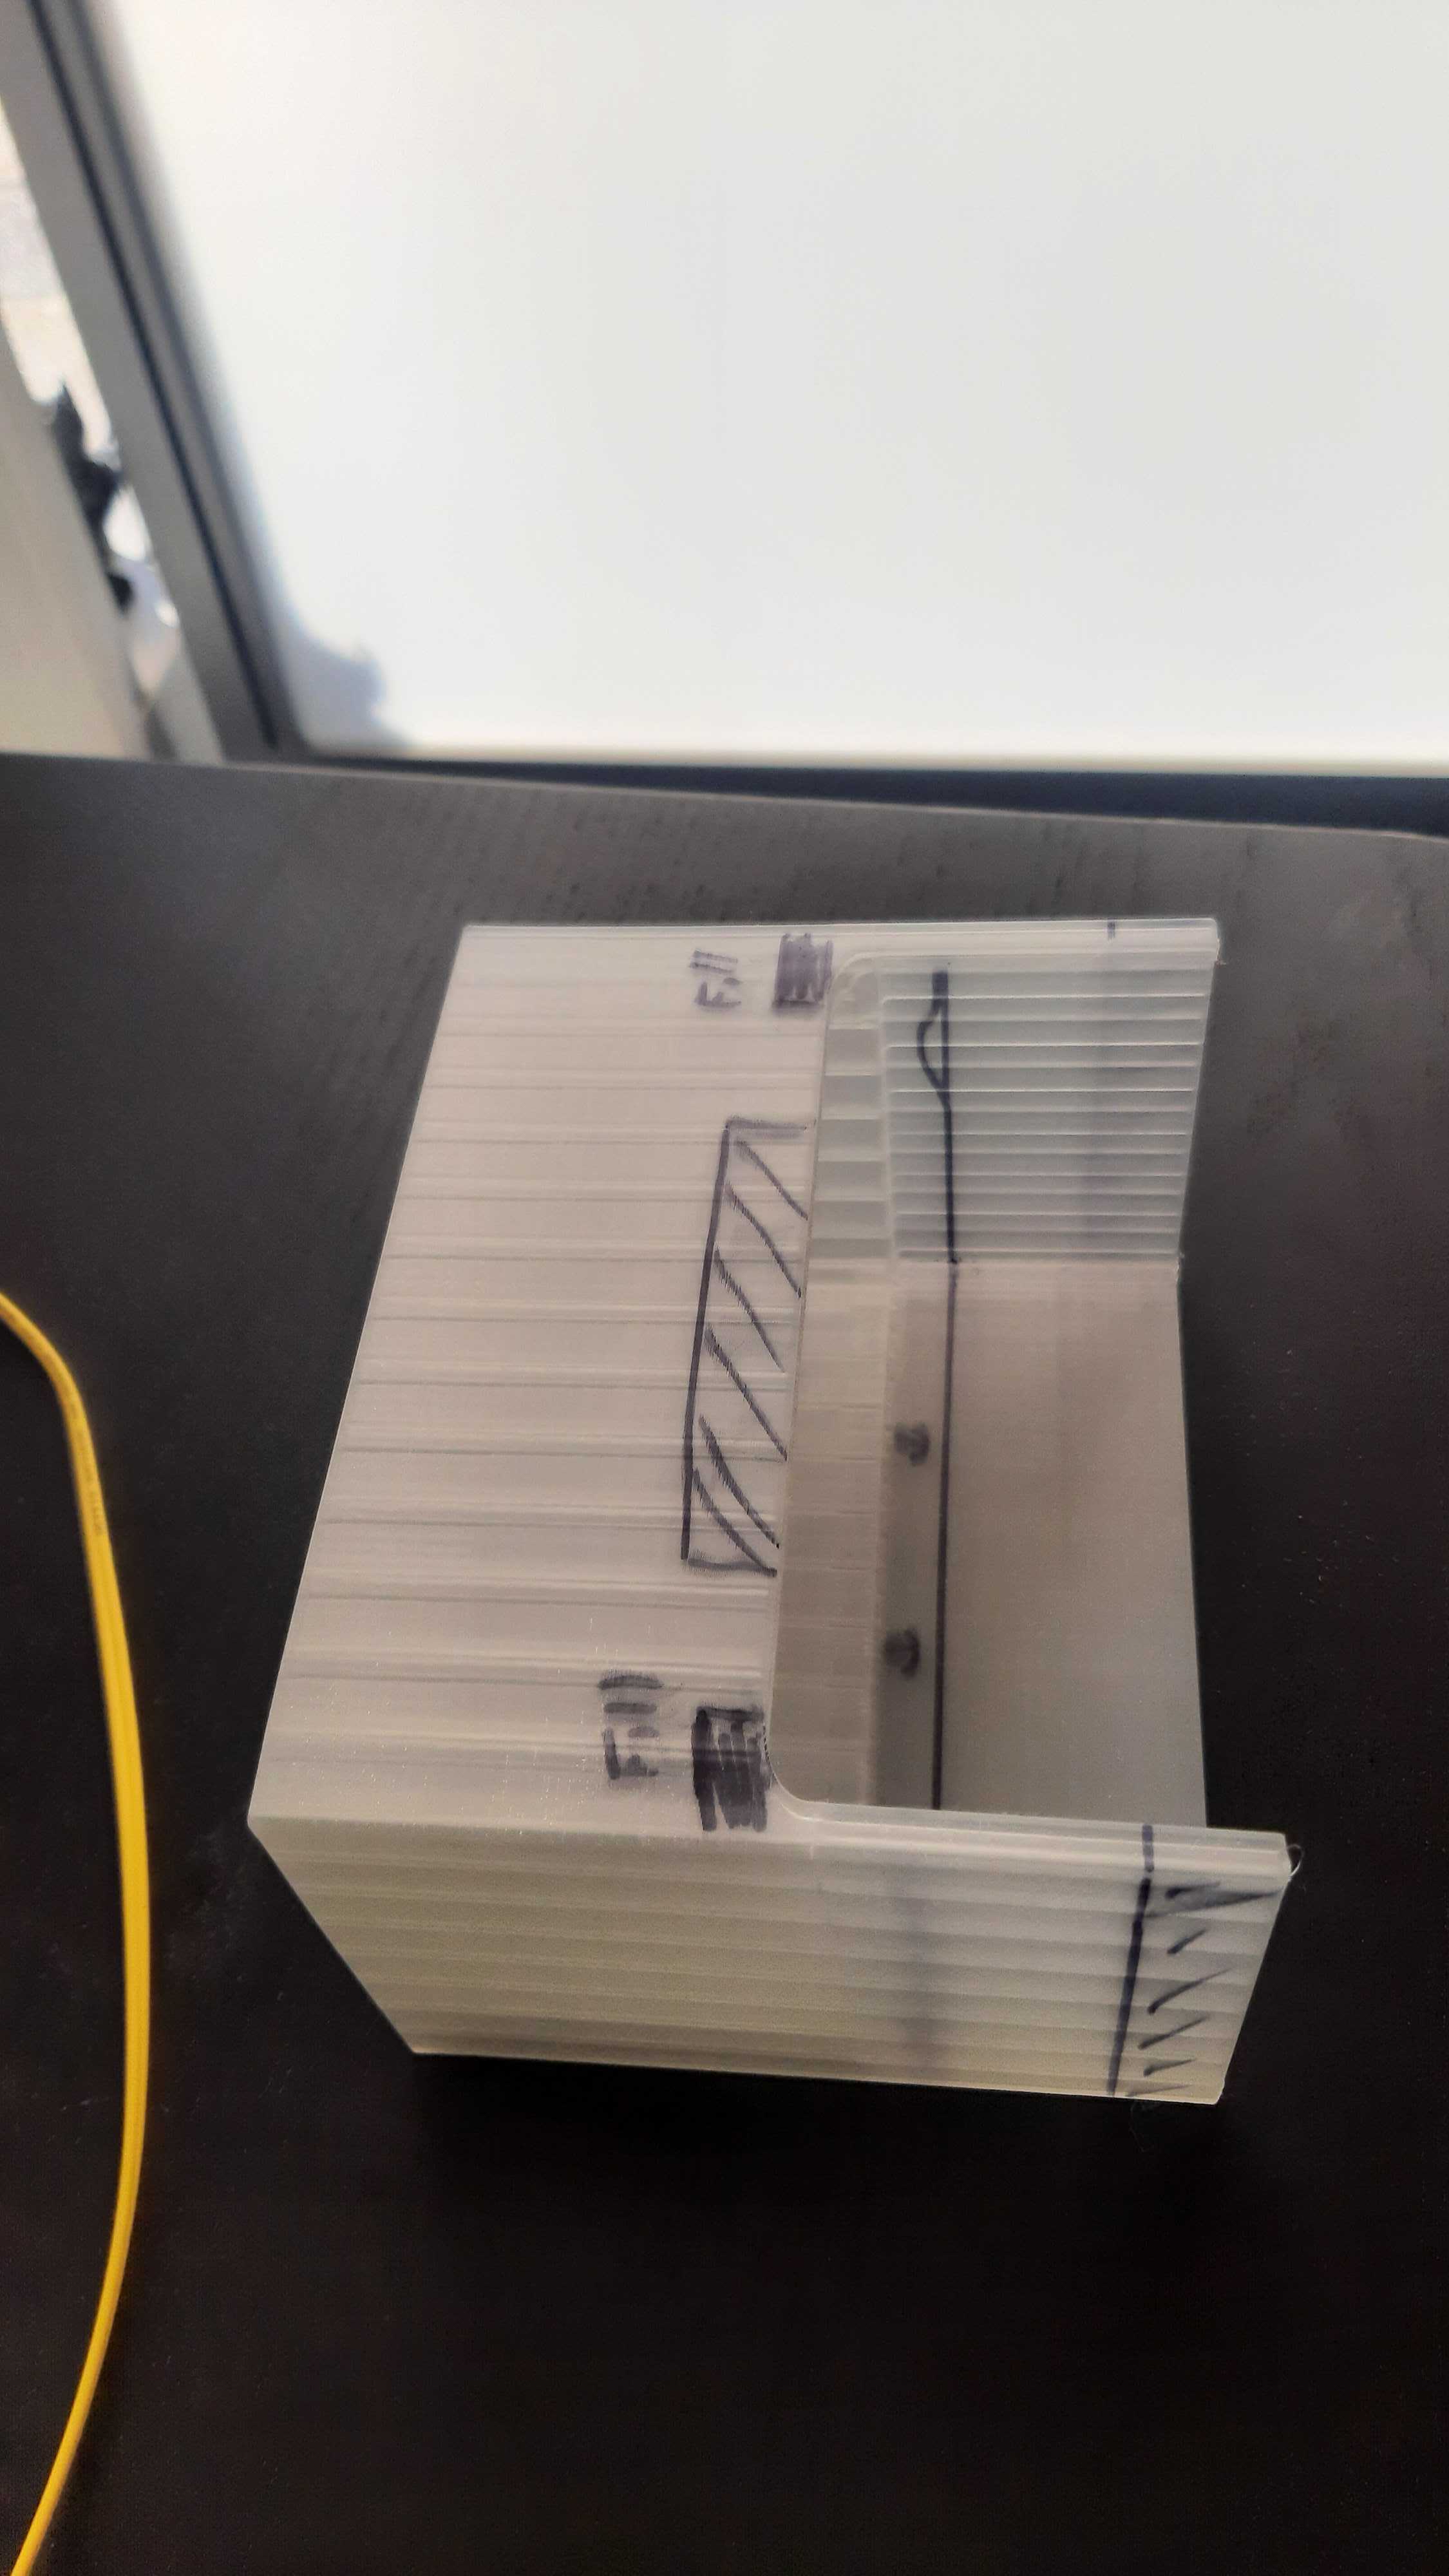
The cover you see above was our first real attempt at trying to figure out what a switch cover might look like. The requestor wanted to have something that could go over the switch ports, but also give enough clearance for the fiber optic cables to extend out without needing to be bent too much (fiber optics have glass in them, so you have to be genteler with them than the traditional RJ-45 cable).
.jpg)
With the second iterations, we started to gve the inside of the container some more space for the cables, as well as a little bit more of a gap for the wires to stick out. Also, we learned (the fun way!) that PLA is no bueno for this sort of work, and switched to PETG. PLA is usually easier to work with, but it does not handle the summer heat well. I'll have a pic of what that looks like at the end of this write up.
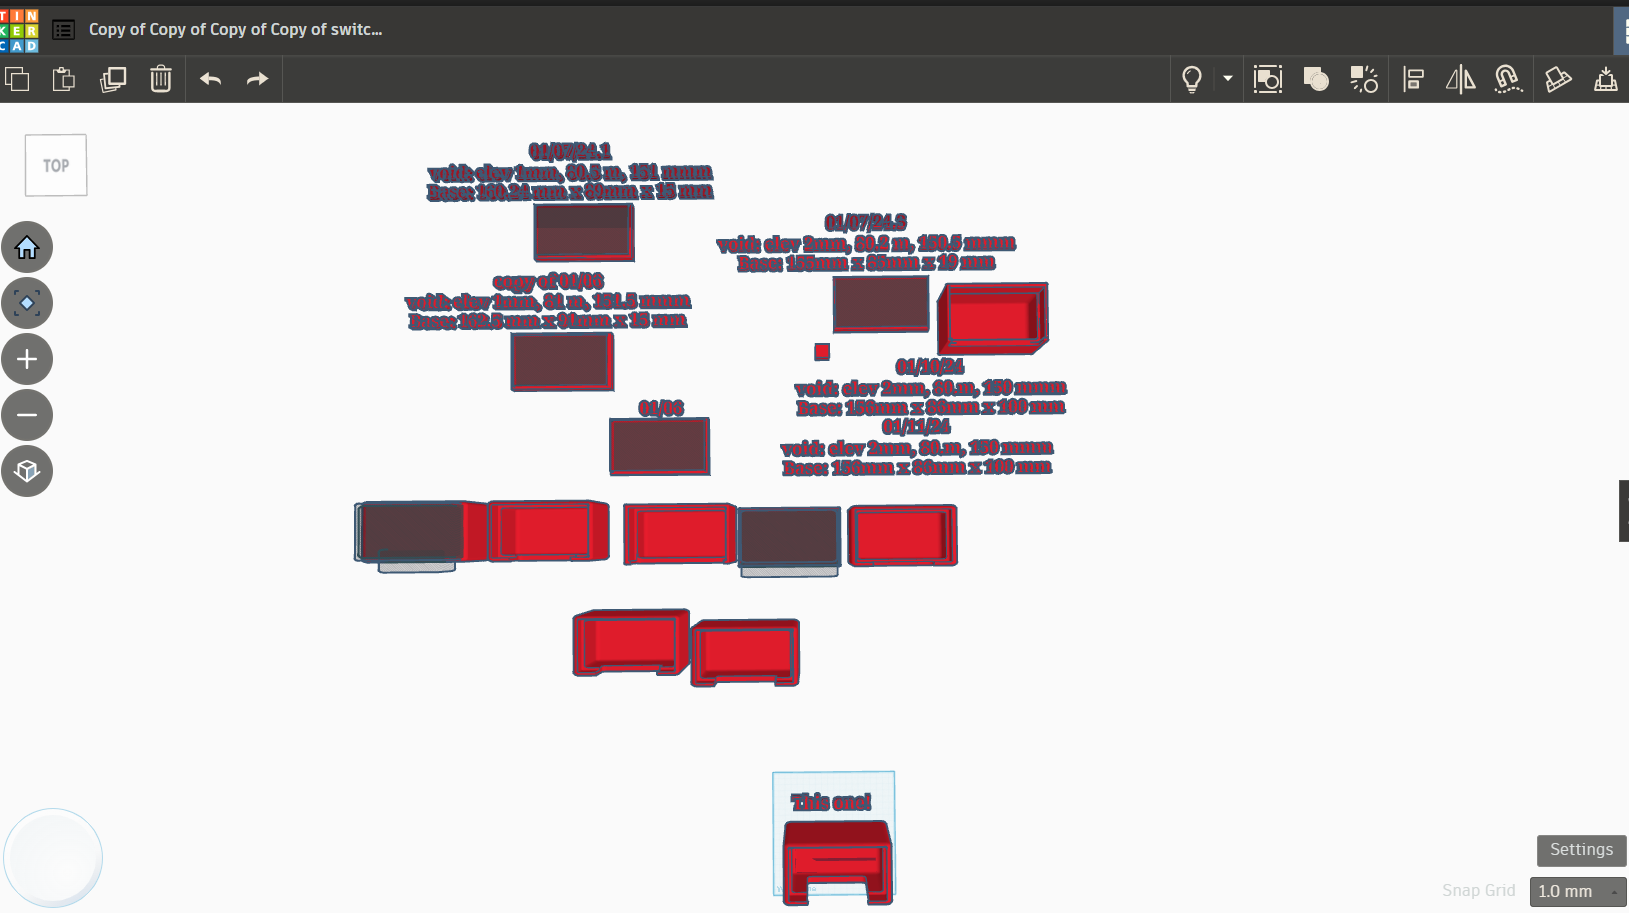
One of the other things I started to learn about during this project was version control. We made a TON of different versions of this, each of which was ever so slightly different. How do you keep track of all these versions? Well I'm still working on a more refined version of this, but one thing I started to do is to make copies of the designs in TinkerCad, with little write ups above each one so I knew what the changes were, as well as the date it was made. The picture above shows all the different major iterations we tried, and I tried to keep whatever the most current working version was on the bottom of my work plane.
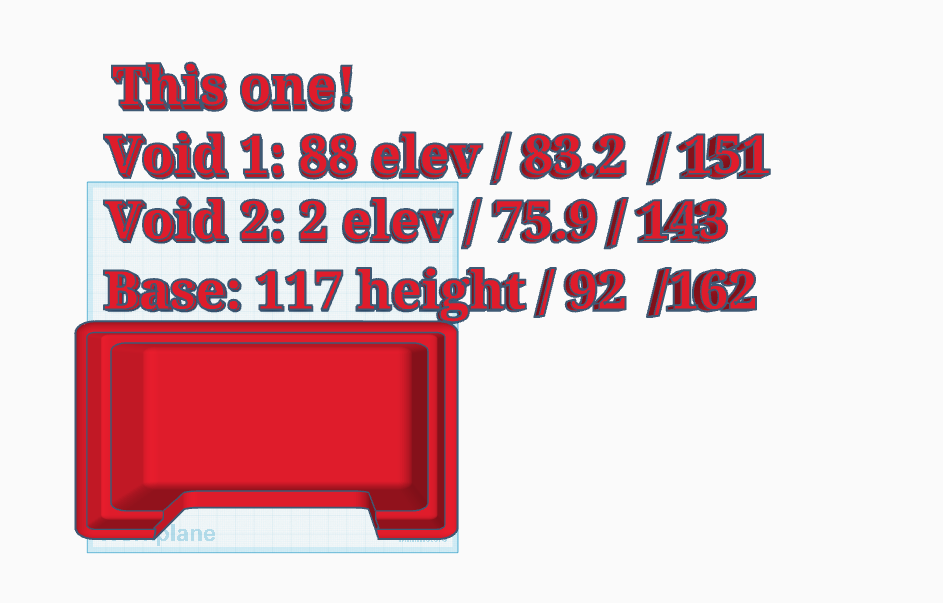
.png)
The picture above shows a more close up version of what I would write for note keeping. The "Void" basically is what I was cutting out of the block to make the space to make way for the wires, and also was a way for me to measure how much of a "rest was designed for the cover to fit onto the switch.
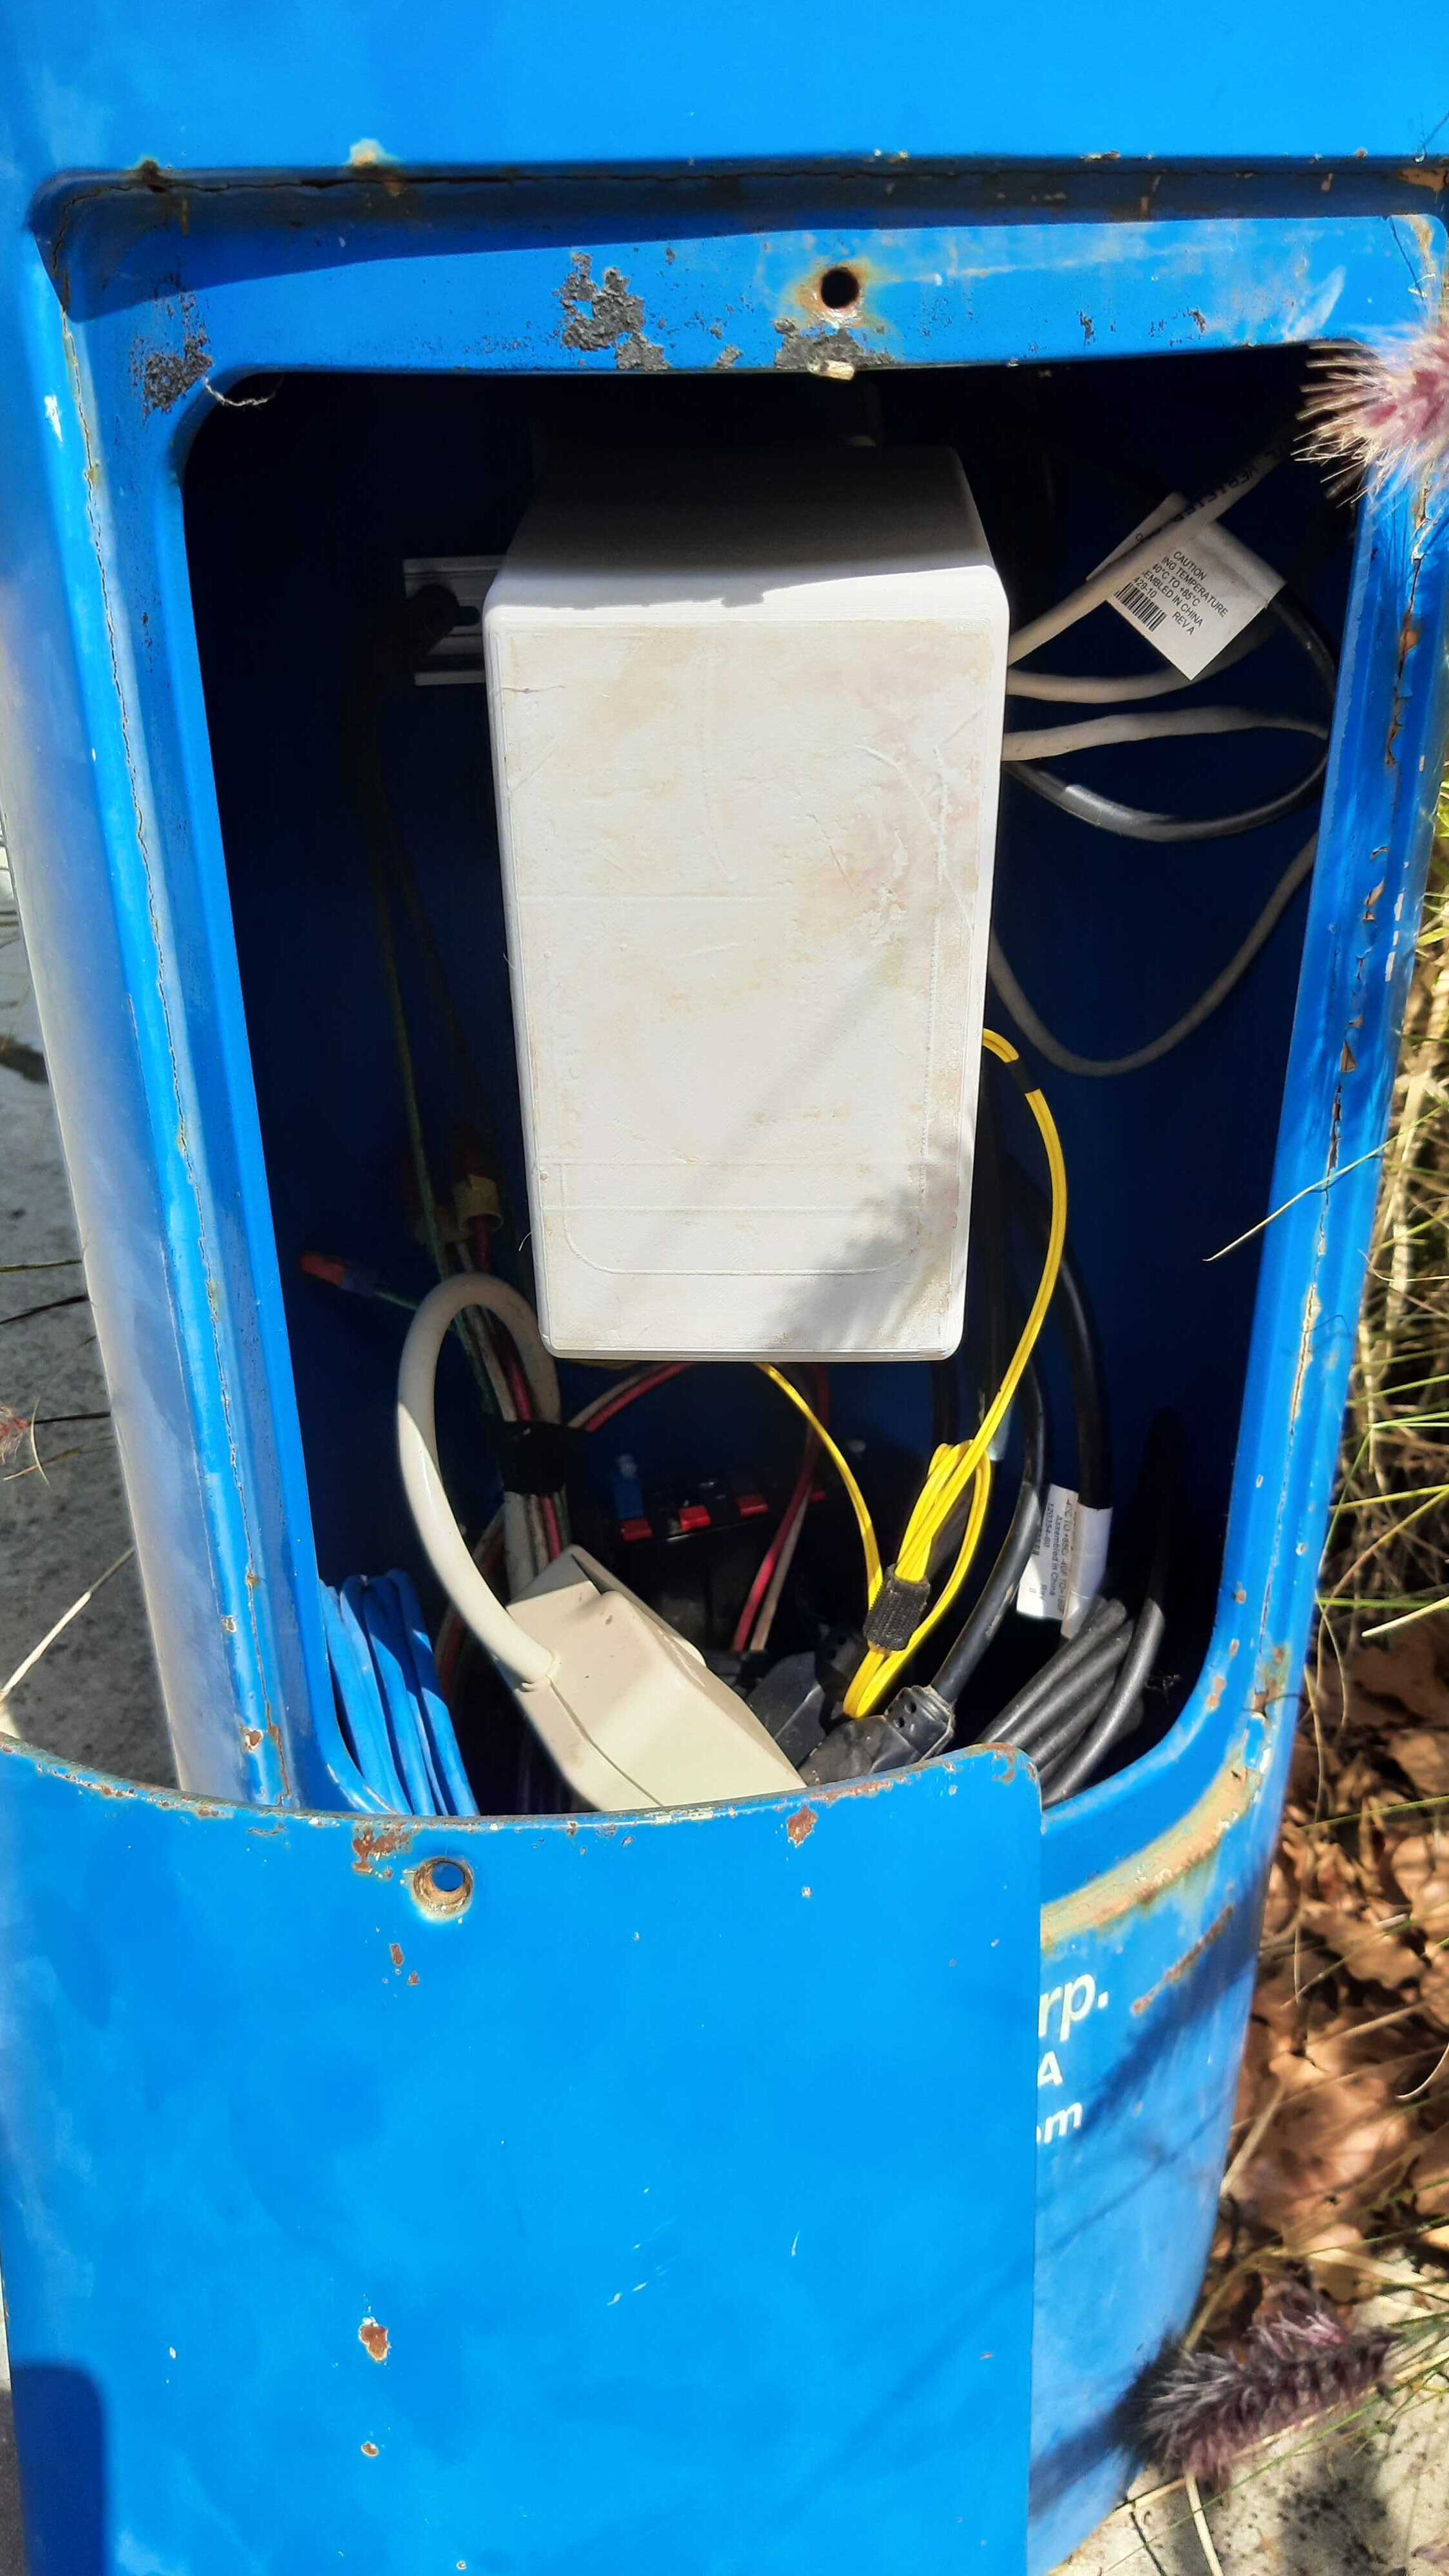
The settings used in Cura are fairly boring (PETG requires higher temps, and we made it with 50% infill), so I'll skip those and get to the final product: a $3 switch cover that protects a piece of equipment that costs $400! We ended up making 20 of these, all of which have still working network switches 😎.
I have the final product with its dimensions pictured above, as well as a link to the switch cover STL file here as well. Again, because this was a protctive piece of equipment, we made it with PETG, which needs to be printed at a higher than normal temprature.
And of course, this is why we test! This was the initial print we made, that was made with PLA...It did well with the rain, not so well with the heat. Thankfully no switches were harmed in learning this lesson.