
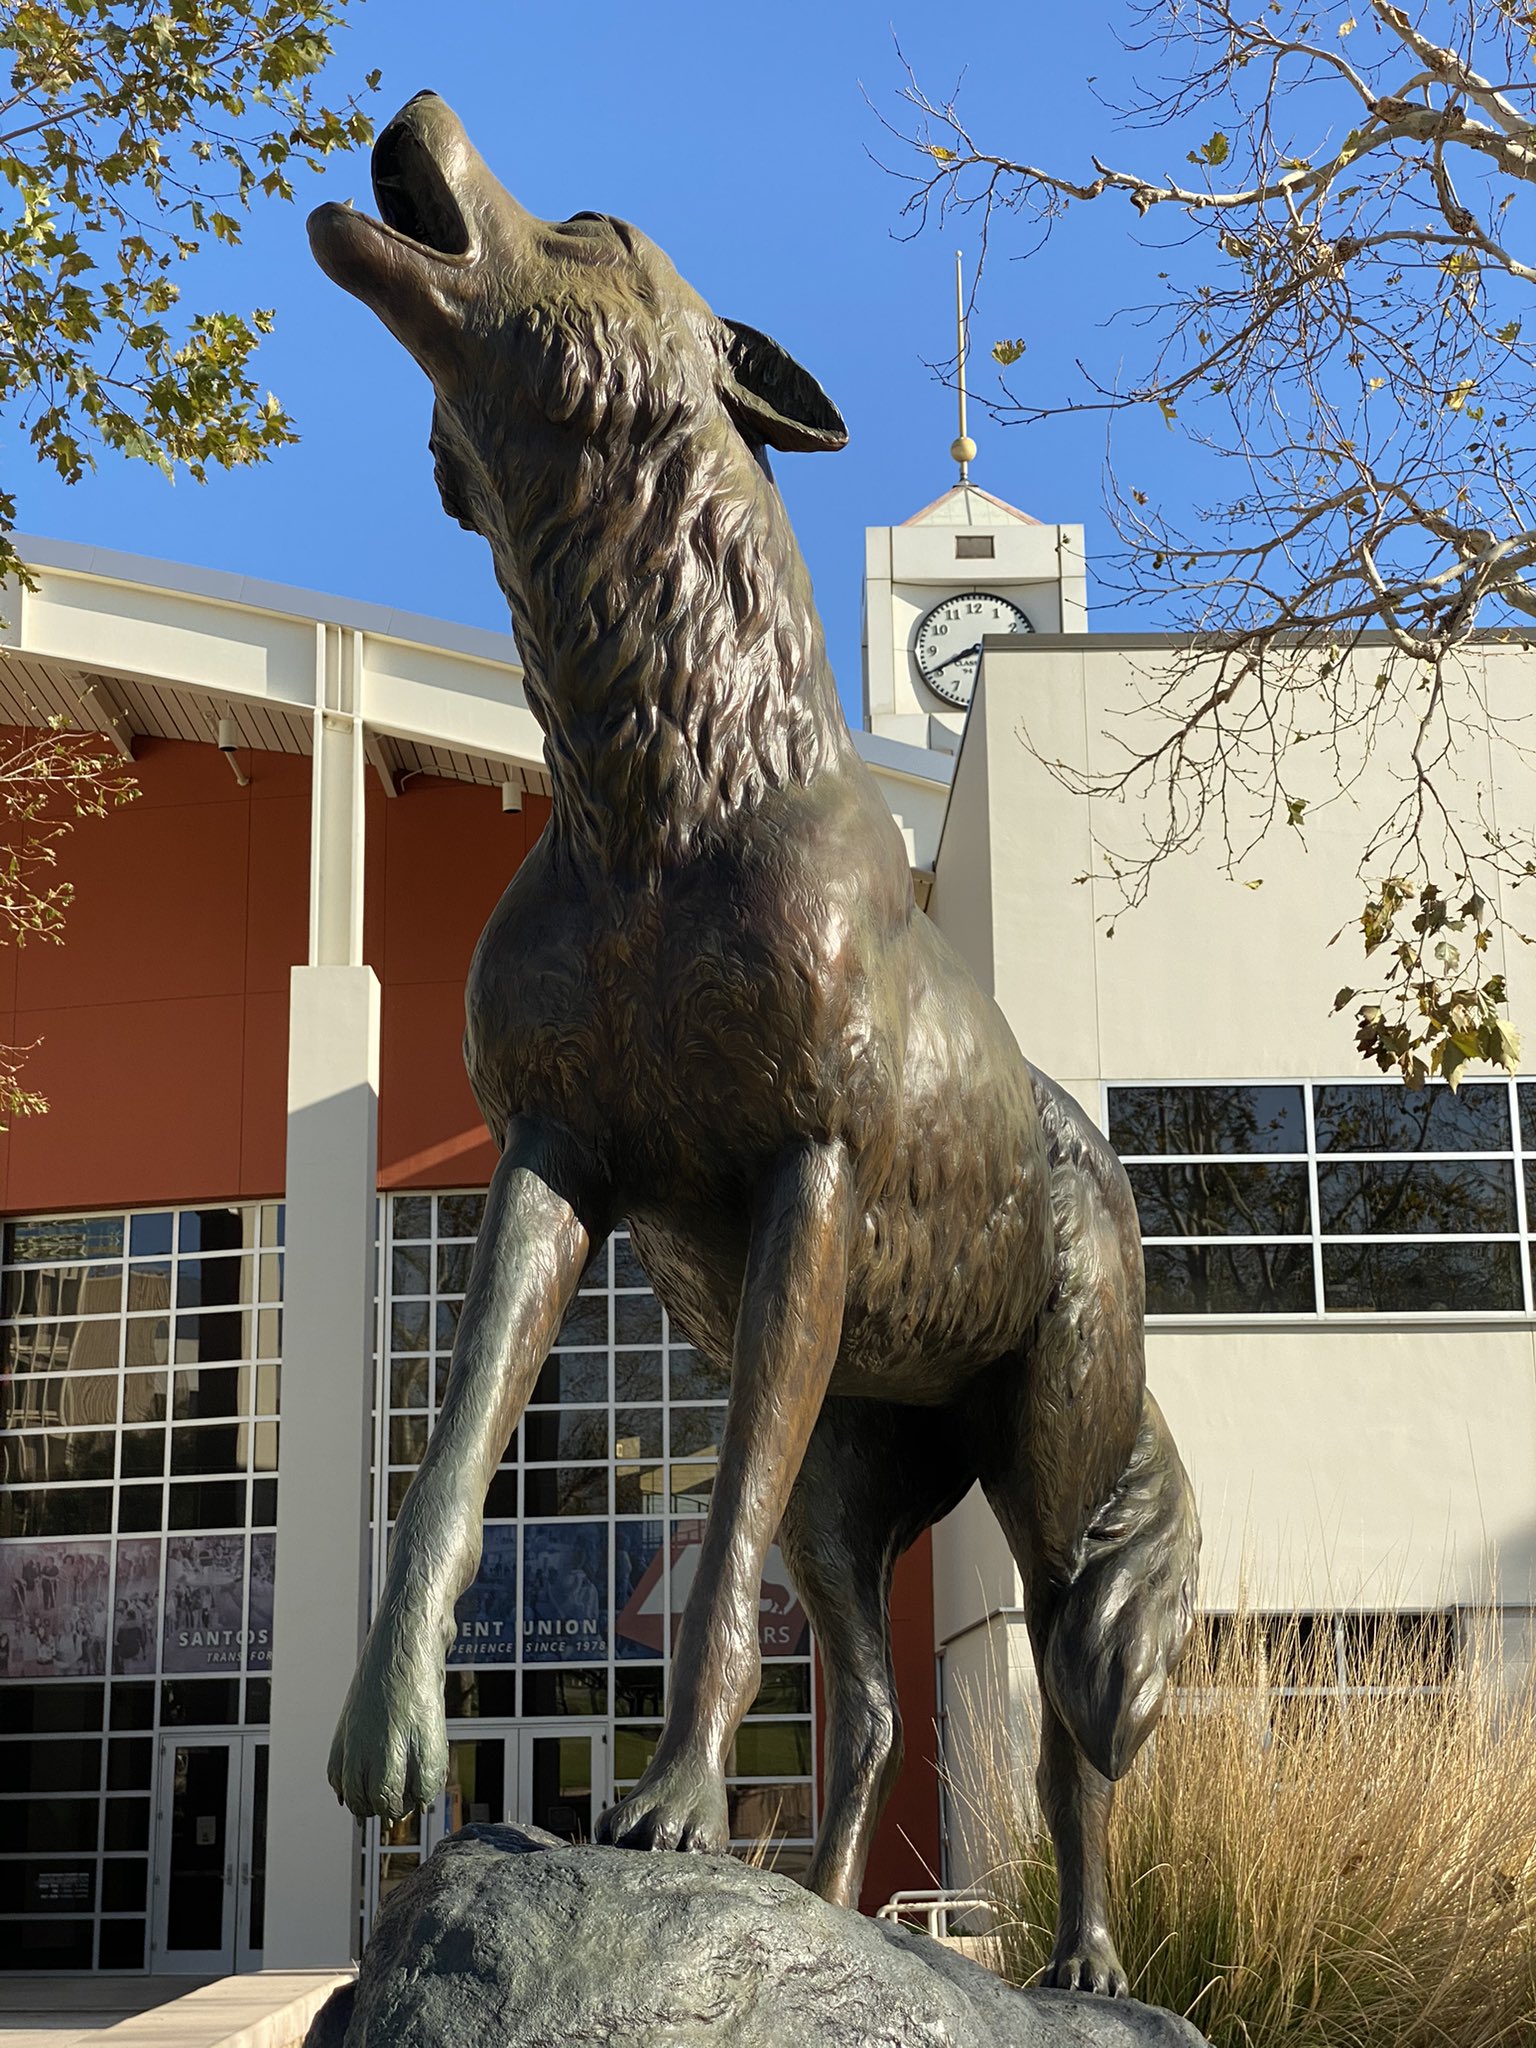
Our campus has a gorgeous bronze statue of a coyote. When I first started to learn about 3D printing, I wondered how I could scan it and print it. This was before Lidar in phones was common, and also before photogrammetry was as easy and inexpensive to use. Shout out CSUSB ASI for the pic of the WildSong statue.
So how do you print this thing? First thing's first, how do I even get the scan of the statue? Can't print it if I don't have a scan. I started looking up ways of doing scanning, and the very first issue was that the scanners that could be used to do this were all $10,000+. So right off the bat, the easy solution was out of the question. So then I thought, "ok, those scanners all work by taking lots of photos of an object, and stitching them together. Is there a program I could use stitch the pictures together, assuming I didn't mind taking a few hours to take the pictures myself?" After a bit of googling, I had my answer: Reality Capture. You could upload your photos to it, and it would "stitch" them together, and it was cheap!
So now I knew how to stitch the pictures together, now I just had to actually get the pictures in the first place. I watched a TON of video (I also put a few of them into this playlist here), and I got a few pieces of advice for how to get good quality photos for the stitching. First, the more pictures the better. Second, overcast weather is the best, as it will give your subject fewer shadows, and make the stitching process easier. Third, get as many different angles as you can. That way you can get all aspects of it properly captured.
With this info, I went to campus that Saturday with a ladder I borrowed from classroom support (shout out classroom AV). I had a Cannon T6 Rebel that I learned how to use during quarantine, and I started taking as many photos of this thing as I could, from every angle. 400ish photos later (and like 5 hours later), I had what I thought was enough photos to at least take a spin in Reality Capture. If you want to try yourself, I have a link here to a google drive with the pictures I used that day.
So I have the photos done, and I have the program to stitch them together, what now? Well now I have to actually get the two to work together. I uploaded the 400ish photos into Reality Capture, and saw an interface that was as confusing as blender's or SCCM's. I'll skip the actual set up in Reality Capture (it is boring and also much different now than it was in the past, and show you what it actually looked like):

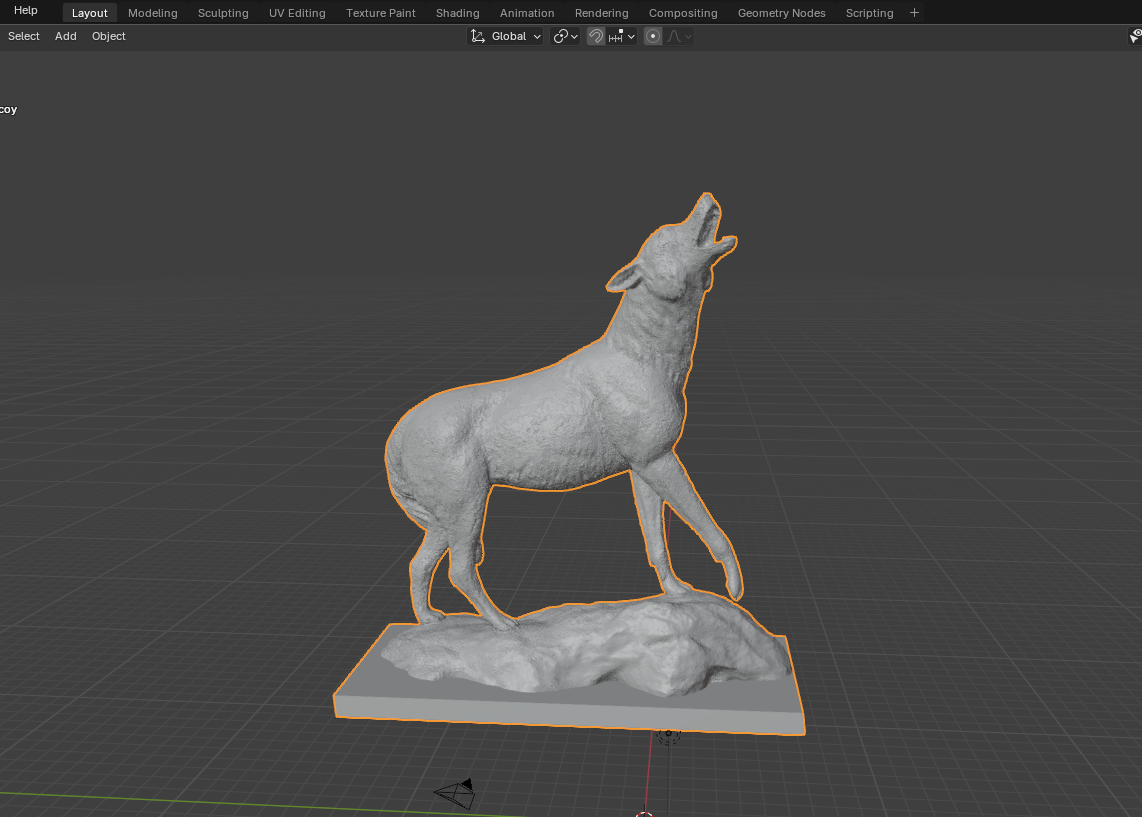
About two hours of rendering later, I had a model good to go! Because it picked up everything in the background as well though, I had to do a bit of editing. Because this part is also boring, I'm just going to skip the end product, WildSong but with a basic base in Blender!
It's perfect! Now that we have the actual model of the statue ready, we need to print this thing. There are, generally, two types of printing that the average person can do. The first is Fused Deposition Modeling (FDM), and the other is Stereolithography (SLA). FDM printing is the most common type of printer most folks have seen. It's got a hotend that melts platic, and uses three directional belts to move the nozzle in the direction you want. It's very nifty! It's also gotten much better in the last few years. However, the main issue with this style of printing is that it really struggles with smaller detail (like a miniature version of a state). Your detail is limited to the diameter of the nozzle. And while 0.4mm is fairly small, it's still not quite small enough to get the level of detail I was looking for. Thus, I went with an SLA printer.
SLA printing is REALLY cool! Instead of melting plastic, it uses UV light to cure the resin. The resin is sensitive to the light that is shined (shoned?) on it, and hardens in response. But now instead of the diamter of the nozzle determining your detail size, you are using an LCD screen to block out light from hitting the resin, meaning you can now get a pixel's worth of definition on your model. So while you are trading off toughness of your print (resin is much more brittle than the PLA I use), you are getting way more detail out of it.
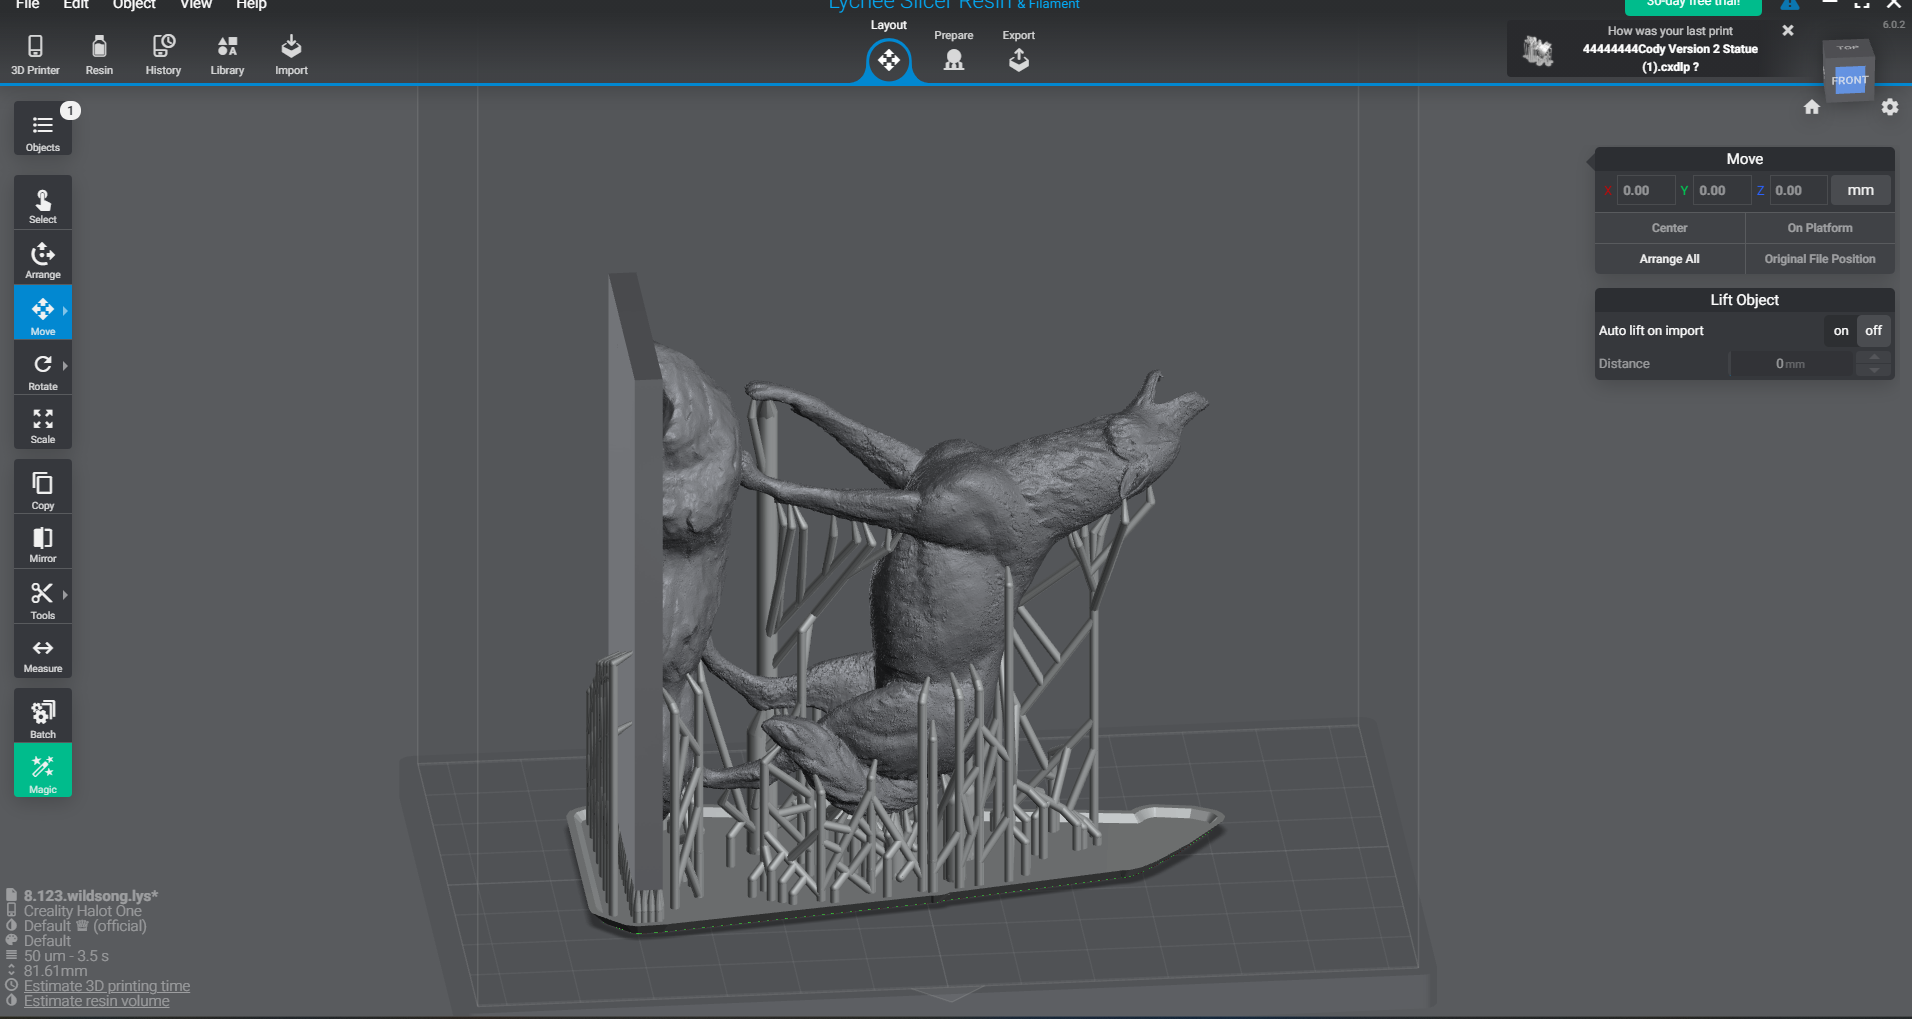
While you use Cura to "slice" FDM prints (slicing is when you "slice" a 3D model into layers), for resin prints I use Lychee. Lychee can do both FDM and resin prints, but it is great resin. For resin prints, you need to do a fair bit of work to properly set up the support trees for the print (you can't prints out of thin air), and to make sure there are no air gaps where uncured resin could hide. Resin is very cool to work with but it is also toxic to the skin in an uncured state. You need to wear gloves, goggles, a mask, an apron, and really make sure you do not get in on your skin. I've gotten uncured resin under my fingernails before, and it is not a fun time. So, after you get your print set up in Lychee, export it to a USB, get your protective gear on, and get the print going!
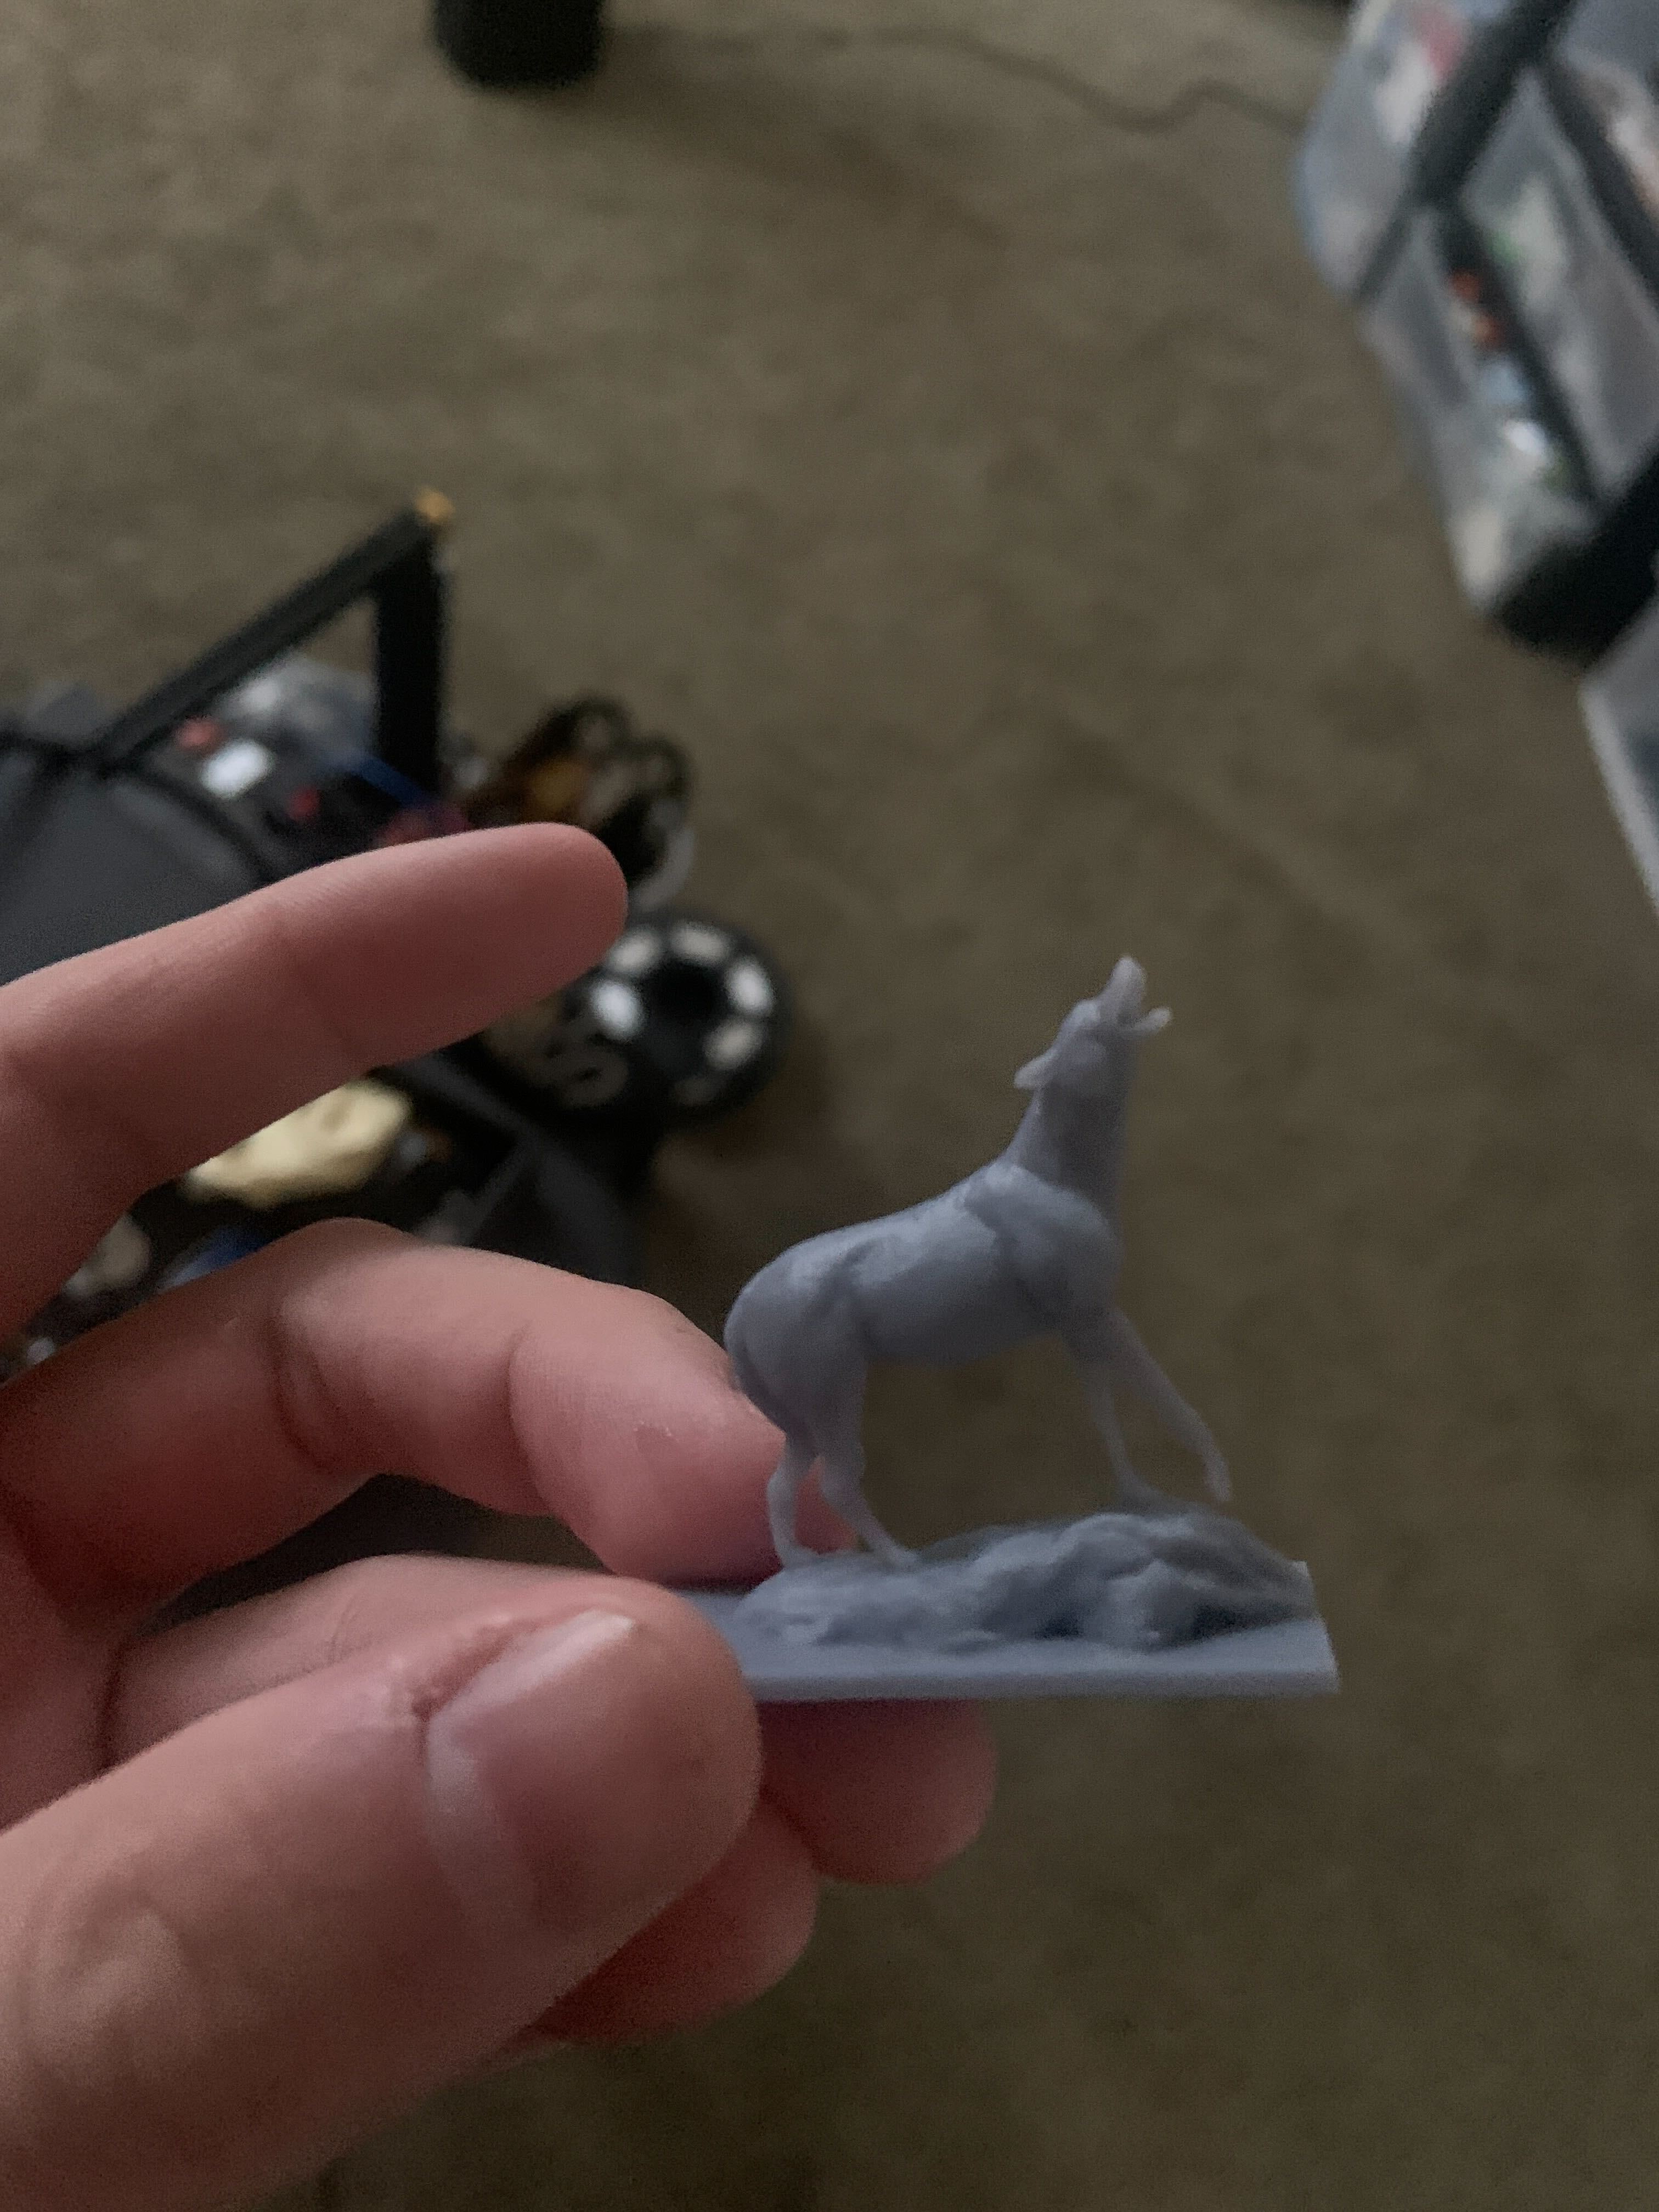
The print settings are boring, so I won't be going over those here. The process of cleaning and removing the supports is also boring. Instead, I'll show you the final product, all supports removed, and fully cured. From start to finish, this took maybe a week or so to get done. The actual print time took about 2 hours. As you can see, because we can use a pixel for our level of detail now, we can get really, really small, and make some cool stuff. If you would like to give it a spin yourself, I have the Blender file linked here, with a short base added to it. Enjoy! Again, if you are using resin printers for the first time, you need to wear full protective equipment!!!